We ventured down to Portland last weekend to visit some of our kids. While there, we helped our son and beautifully pregnant daughter in law tie-up a remodel of their newly purchased 1940’s home. Among painting projects and helping to organize their kitchen, Cath and I talked about the ongoing challenge of putting a healthy dinner on the table without a lot of fuss. I half heartedly (in between brushstrokes of painting doors) narrated a pinto bean dip that I made multiples of and froze back in the day when life was so busy raising our big family. She was inspired and sent me off to the grocery store to fill her cupboards with ingredients for this recipe and then it was back to painting doors for me.
Fast forward 3 days, I’m back at home when I see her name flash across my phone screen. She was calling for details. Sure enough, she had started the recipe, so I inquired…. did you soak the beans? She answered “yes”. Oh good, I thought, we’re off to a good start. For how long? For 24 hours! Yikes!! (Six to 12 hours is good enough, any longer and they may start to sprout). Wanting to get an idea just how many casseroles she was planning on making I asked her how much of the 5 – 6 cup bag of pinto beans she soaked. All …was her answer this time…we were howling with laughter at this point! Beans double or triple their volume after soaking! Well, after all was said and done, she cooked up volumes of pinto beans, froze most for later use and turned out 2 tasty pinto bean dip casseroles.
Obviously what was so familiar and easy for me, was not so, for her. Talking “bean talk” with others led me to conclude cooking legumes from scratch can be unnecessarily intimidating. That bean dip recipe will have to wait for another post….but here you have Bean Basics 101.
The lowly bean gets a bad rap for their potentially “explosive” nature and the time that’s required to cook them. Once the beans are rinsed which takes maybe 5 minutes of your time, they just sit to soak for 6 – 8 hours. What’s required more than anything is planning ahead. You may still think why bother?? I’ll tell you why…
Dried beans are available year-round, are inexpensive, and can be found in any well-stocked market. You can feed so many people at so little cost. You don’t need to shop at a special store or spend a lot of money on fancy health foods to reap great health benefits from beans. Basic beans can supply a load of chronic disease fighting benefits for well under a dollar per serving!
If stored properly, dried beans and peas will last for a year or more. Store the beans in a dry, tightly closed glass jar in a cool, dark spot. My pantry is full of a colorful variety of dry legumes, but I always have a few canned varieties on hand to put something together on the fly.
The soluble fiber in beans helps lower levels of damaging LDL cholesterol in the blood, and by so doing, it lowers your heart-disease risk. And by slowing down carbohydrate absorption, soluble bean fiber helps even out unwanted peaks and valleys in blood glucose levels — especially valuable to people with diabetes. All that fiber helps with digestion and keeps your bowel functions working well also.
Legumes are also rich in folic acid, copper, iron, and magnesium — four nutrients many of us could use more of in our diets. In addition, dried beans and peas are generally good sources of iron, which is especially helpful for people who don’t regularly consume meat.
About Cooking Beans
When cooking with dried varieties of legumes, just plan ahead. Before soaking or cooking, sort through the beans, discarding bad beans, pebbles, and debris. Then rinse the beans in cold water. It’s best to soak your beans overnight, for six to eight hours; they’ll cook faster and you’ll get rid of gas-producing carbohydrates. But if you haven’t planned far enough ahead, you can quick-soak for one hour. Quick-soak by putting the beans in water and boiling for one minute; then turn off the heat and let the beans stand in the same water for one hour.
After soaking, discard any beans that float to the top, then throw out the soaking water and add fresh water to cook in. Add enough water to cover the beans plus two inches. Adding a 3 inch piece of kombu seaweed to the bean water helps the beans get tender and aids in digesting them. Bring pot to a boil, skim off foam, then simmer, covered, until tender — about one to three hours, depending on the bean variety. They’re done when you can easily stick them with a fork. Remember, cooked beans double or triple in volume.
While beans are notoriously bland-tasting, they can take on many flavors including fresh herbs and spices. Besides the nutrient rich benefits they bring to the dinner table, they offer great body, texture and richness to soups, spreads, dips and salads.
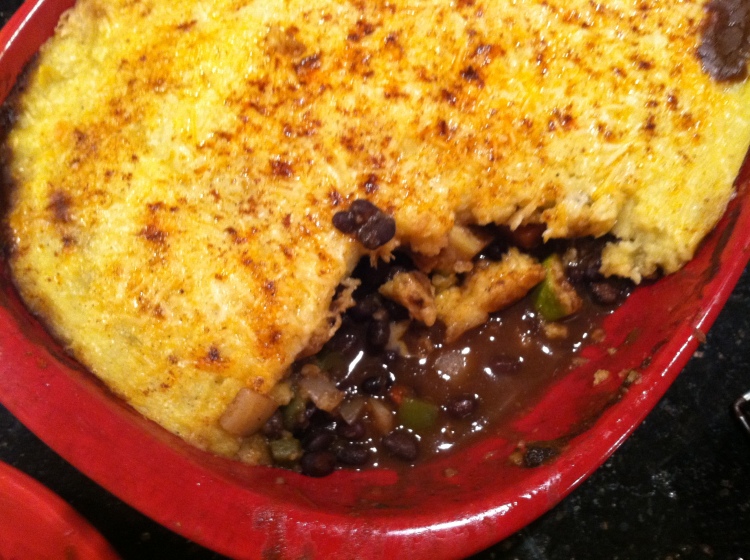
Here is a great tasting bean dish that’s family friendly and gluten-free. This is a vegetarian dish but you can easily add some meat in the filling. We also preferred to have a more generous layer of polenta on top. This recipe is slightly adapted from Feeding the Whole Family by Cynthia Lair pairing black beans with polenta.
To be more efficient with my time, I cooked the beans a few days ahead, and made the filling the day before serving, refrigerating it in the dish I ended up baking it in. The day we were having it for dinner, all I had to do was make the polenta and a vegetable side.
That’s enough talk…Now, let’s get cooking!
Mexican Bean and Polenta Casserole
BEANS
1 cup black beans, soaked and drained
1 garlic clove
1 teaspoon ground cumin
3 cups water
1 teaspoon sea salt
VEGETABLES
1 teaspoon olive oil
1 onion, chopped
1 garlic clove, minced
½ teaspoon sea salt
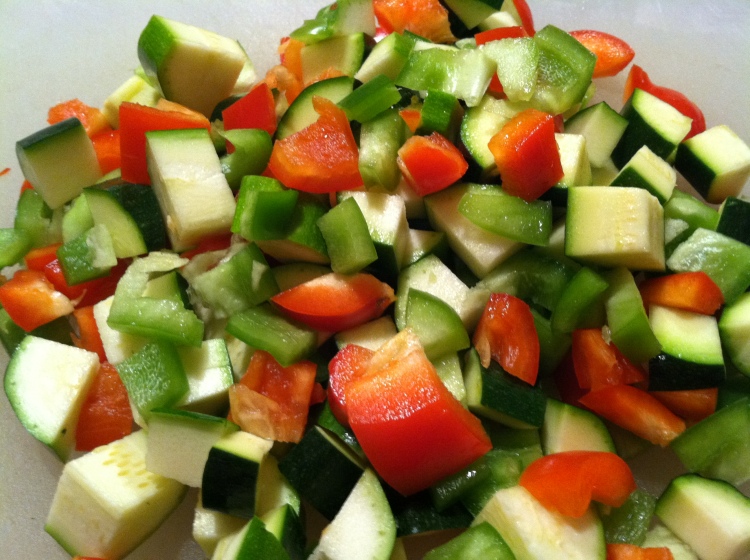
½ red pepper, chopped
½ green pepper, chopped
1 cup chopped zucchini
1 -2 teaspoons ground cumin
1 teaspoon dried oregano
½ cup organic tomato sauce
¼ cup water
POLENTA
3 cups water
½ teaspoon salt
1 tablespoon oil
1 cup polenta (corn meal)
¼ – ½ cup grated cheddar or parmesan cheese
To make the beans, place them in a large pot with the garlic clove, cumin, and water. Bring to a boil, then simmer over low heat, covered, until tender (50 to 60 minutes) or pressure-cook with 2 cups of water (45 minutes). Add salt after beans are soft.
To make the vegetables, heat oil in a large skillet. Add onion, minced garlic, and salt; sauté until soft. Add peppers, zucchini, ground cumin, and oregano; sauté 5 more minutes. Add cooked beans to the vegetables with tomato sauce and water,. Check taste and add salt if necessary.
To make the polenta, in a separate pot, bring the water to boil. Add salt and oil. Slowly add polenta, whisking it in continuously. Lower heat and continue stirring for 10-15 minutes until mixture is quite thick.
To assemble casserole, preheat oven to 350. In a lightly oiled casserole dish, spread the bean and vegetable mixture across the bottom. Spread polenta on top. Sprinkle top with grated Parmesan or Cheddar cheese. Top with a sprinkling of chili powder. Bake, covered, for 25 minutes at 350; turn heat up to 400, remove cover, and cook another 5 minutes.
Yummy!!
In other news, I have 2 spots available in the upcoming soup class on Saturday, February 18th…. Please contact me @ cookwithamyg@gmail.com if you are interested and want more info.
Mark your calendars for my Better Breakfast Class coming up on Saturday, March 24th 11 am – 1 pm with many new breakfast foods!
Happy Cooking!
Amy


That looks great! I always top polenta with things instead of putting it on top, but that looks much more elegant. I will try this recipe when my mom visits, she’s a big fan of polenta.
Posted by emmycooks | February 2, 2012, 8:38 amThis looks delicious! Thank you for lesson in dried beans. I have stayed away from them not knowing how to properly prepare them.
Posted by pam Lilla | February 2, 2012, 4:56 pmHappy to hear this was helpful! Thanks for visiting…
Posted by Amy Grady | February 4, 2012, 10:42 pmYum, YUM!! Beans are one of my favorite ways to cook healthy and save money. Great post!
Posted by Bethany | February 2, 2012, 6:42 pmThanks Bethany!! They are so versatile too. Appreciate your feedback.
Posted by Amy Grady | February 4, 2012, 10:40 pmHey Amy,
I cooked this for me and my parents last night and it was a big hit. Being meatatarians we added a lb of ground beef which worked well. One of the great things about this recipe is that it works for gluten free diets which my mom is on. I suggest topping everything with sour cream and salsa which we did and turned out great!
Trey
Posted by Trey Murff | February 4, 2012, 1:48 pmGlad you liked it! We topped ours with fresh guacamole because we prefer less dairy, either way it’s yummy! Thanks for stopping by Trey!
Posted by Amy Grady | February 4, 2012, 3:04 pmDo you mind if I quote a couple of your articles as long as I provide credit and sources back to your blog? My website is in the very same area of interest as yours and my users would truly benefit from some of the information you present here. Please let me know if this okay with you. Thank you!
Posted by videos de messi | April 15, 2012, 8:44 pmno, that’s fine with me. Thanks for asking and stopping by! ag
Posted by Amy Grady | April 17, 2012, 3:01 am